Our website is made possible by displaying online advertisements to our visitors.
Please consider supporting us by disabling your ad blocker.
MaGeSY ® R-EVOLUTiON™⭐⭐⭐

  • Groove Agent 5 Explained TUTORiAL-SYNTHiC4TE
    July 21st, 2019 ⚡
    Categories: TUTORiALS

    image

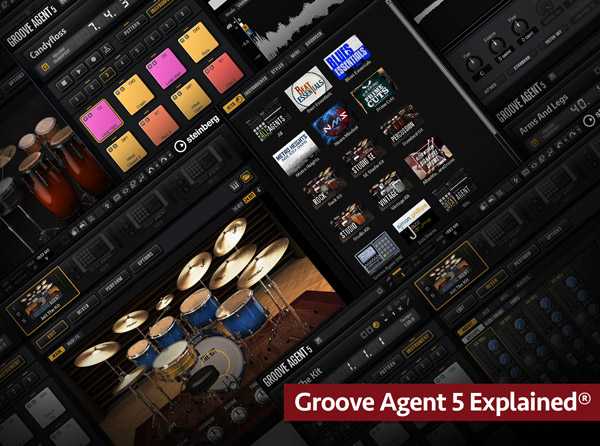
    Groove Agent 5 Explained®

    SYNTHiC4TE | July 21 2019 | 260 MB

    In-depth Groove Agent tutorials! Learn all of Groove Agent 5’s features and functions as well as how to make realistic drum beats and more. These Groove Agent video tutorials are perfect for those starting out with Groove Agent 5, or just want to know more about this powerful virtual drum instrument. Eli gets you going fast with important foundational videos on Groove Agent 5 including a detailed overview of the user interface, how to load and customize kits, as well as replace individual drums. Styles is then explained and explored so you can create a wide variety of beats and grooves. Next, Eli shows you all about Agents, and how to work with multiple Agents, layer them, and the different acoustic and percussion Agent options. Editing and mapping instrument pads is then shown and you’ll see how to drag and drop, reorder, swap, exchange, move, copy and reassign instrument pad assignments and layouts and much, much more.


    Viewed 5337 By Music Producers.


    • ATOM Explained TUTORiAL-SYNTHiC4TE
      July 8th, 2019 ⚡
      Categories: TUTORiALS

      image

      ATOM Explained TUTORiAL

      SYNTHiC4TE | July 07 2019 | 530 MB

      Learn all about this powerful, compact MIDI controller and what it can do for your studio and production workflows. These Presonus ATOM tutorial videos are perfect for the new ATOM user who wants to learn ATOM basics and start using it fast. Starting at the beginning, Thomas greets you and gives you an introduction and overview to ATOM. Next you’ll learn the important foundational topics like navigating projects, browsing and using presets, Song Setup Mode, using macros, and the different Pad Modes and controls. Keyboard Mode is then explained, and you’ll see how the Note Repeat and Velocity Sensitivity modes are used to create cool parts and patterns. Thomas then teaches you how to record and sequence MIDI patterns from the ATOM controller, how the Impact XT drum machine can be controlled by the ATOM, as well as how the pattern editor is used to create interesting drum parts.


      Viewed 2282 By Music Producers.


      • Analog Lab 4 Explained TUTORiAL-SYNTHiC4TE
        July 8th, 2019 ⚡
        Categories: TUTORiALS

        image

        Analog Lab 4 Explained TUTORiAL

        SYNTHiC4TE | July 07 2019 | 123 MB

        In-depth Analog Lab 4 tutorials! Learn all about the powerful workflow and sound design features found in Analog Lab 4. These Analog Lab videos are for those just starting out with Analog Lab 4, and want to get up and running fast, as well as know about more advanced Analog lab features. Tyler first introduces Analog Lab 4 and then goes over the basics, such as the Analog Lab interface, and making proper MIDI settings and connections. Next you’ll discover the powerful Browser and Preset Management options, including the A.I. feature which uses artificial intelligence to predict and make preset suggestions!


        Viewed 3167 By Music Producers.


        • Logic Pro X 10.4.5 Update Explained®
          June 22nd, 2019 ⚡
          Categories: TUTORiALS

          image

          Logic Pro X 10.4.5 Update Explained®

          SYNTHiC4TE | June 21 2019 | 110 MB

          A collection of Logic Pro X 10.4.5 tutorials! Learn all about the new features and functions added to LPX 10.4.5. These Logic Pro X 10.4.5 tutorial videos are designed for experienced Logic users who want to know all about what’s new in Logic 10.4.5 and get up to speed. Eli hits the ground running with a video on the new De-Esser 2 plug-in that comes with Logic Pro X 10.4.5, including its new “set and forget” Relative mode featuring a unique dynamically adjusting threshold level. Next, Eli reveals all the new Key Command features, as well as Logic’s updated MIDI synchronization options. Moving on, you’ll learn all about Logic’s new time-saving record feature that allows you to avoid duplicate MIDI note events at the same position when cycle/merge recording, or merging regions. Eli then goes over in-detail, the new Mixer engine that’s been re-written from the ground up! Last but not least, you’ll learn about all of the many new improvements that help overall workflow, including but not limited to improved flex pitch quality, a revamped Undo system, enhanced performance meter to measure system usage, revamped project chooser, a renamed audio recording preference, new filter buttons in the Loop Browser, and many more.


          Viewed 2240 By Music Producers.


          • Multiband Compression Explained TUTORiAL
            June 20th, 2019 ⚡
            Categories: TUTORiALS

            image

            Multiband Compression Explained

            P2P | 31 December 2015 | MP4 | 294 MB

            In this tutorial course, show you how to use one of the most underrated mixing tools, the multiband compressor. From the basics of what multiband compression is, when to use multiband compression and of course, how to apply multiband compression creatively. You’ll learn all you need to know to make working frequency crossover bands second nature. Explore the theory behind the techniques, discover effective plugins and improve your workflow. Avoid common pitfalls and get plenty of practical walkthrough examples with professional tips and tricks for applying multiband compression on bass, drums and other instruments.


            Viewed 6112 By Music Producers.


            • Captain Chords Explained TUTORiAL UPDATED-SYNTHiC4TE
              June 12th, 2019 ⚡
              Categories: TUTORiALS

              image

              Captain Chords Explained®

              SYNTHiC4TE | June 12 2019 | 223 MB

              Captain Chords! Learn all about this indispensable writing tool and how to use it to create fantastic chord progressions for your songs and productions. Larry starts out by welcoming you and then explains the two basic ways of utilizing Captain Chords as either a plug-in sound module or MIDI FX. Then you’ll see how to choose your scale or key in Captain Chords, learn more about the different areas of the plug-in GUI, and the different ways you can “play” the plug-in as a sound module, a chord jamming instrument, or an automatic progression generator. Moving on, explore how the Space Knob allows you to introduce spaces into your progressions in different ways, and how to give a strumming action to your progressions mimicking a guitar. Larry then shows you the Sound Preset area where you can select presets and then tailor them to your needs using Reverb, Delay, Filtering, and Automation. Throughout the rest of the video series you’ll see how to manually create chord progressions, edit your existing chords, arrange progressions in your DAW, and use both Captain Deep and Captain Melody for even more creativeness. Plus, you’ll also learn how to jam new ideas with Captain Play and much more.


              Viewed 10581 By Music Producers.


              • Cubase 10: MiXiNG Explained TUTORiAL-SYNTHiC4TE
                June 12th, 2019 ⚡
                Categories: TUTORiALS

                image

                Cubase 10: MiXiNG Explained®

                SYNTHiC4TE | June 12 2019 | 748 MB

                In this video tutorial series, DAW pro delivers an in-depth collection of video tutorials on how to prepare and mix a song in Cubase 10. Learn the important basics as well as more advanced topics when getting ready to mix your next masterpiece! First, Gary welcomes you and goes over what will be covered in the series, and then starts at the beginning, showing you how to prepare for mixing with steps like packing your tracks into folders for an easier mixing workflow, and assigning colors to your tracks for simple visual recognition. Next, learn how to use the Marker Track and Arranger Track to map out your song’s arrangement and quickly navigate between the different sections while mixing, as well as how to clean up any issues your audio may have by using Strip Silence. You’ll then get detailed coverage of the Mix Console, using Group Channels, Track Divider, Gain Staging and VU Metering pointers and more. Gary then starts to mix the tracks, and you’ll see common practices for processing Drums, Bass, Guitars, and Vocals, including using Sidechain Compression, reverb, effects and more.


                Viewed 4918 By Music Producers.


MaGeSY Podcast: Subscribe & Stay up to date with all the Audio Posts that are published in MaGeSY MaGeSY Instagram Official MaGeSY-Youtube Official MaGeSY-X Official MaGeSY-Facebook Official MaGeSY-Pinterest Official MaGeSY-WhatsApp Channel Official

With Adblocker the page loads slower & avoid enhanced new search


ಮ್ಯಾಜೆಸ್ಯ್